 Well we have done the regularizing, the scaffolding and finally the Black and white phase. Now comes the fun part, really.
Since most of the hard work has been done, what with the tracing of straight prims over the surfaces of tortured or sculpted ones, This step brings you into the realm of color, layers and Photoshop Filters. It takes a little bit of observational skills, but not necessarily a lot of art skill to create acceptable and decent looking texture maps, as you just have to observe effects around you.
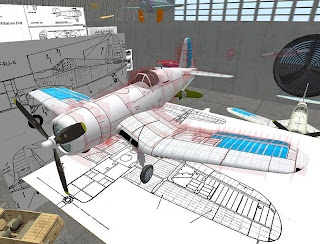
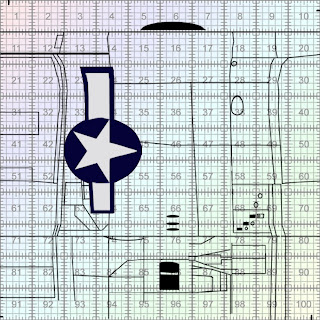
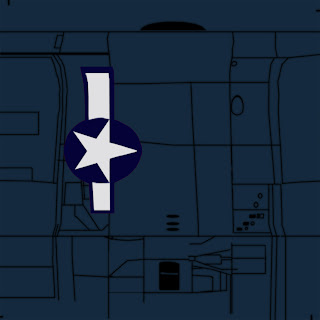
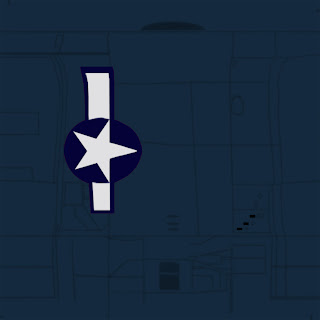
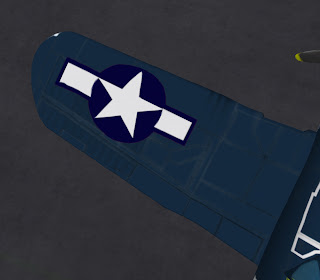
For this Corsair we just start with the black and white likes we had before, plus the Insignia. Here’s the Wing. (
Click on Images to see full resolution, however, be warned, the images are large.)
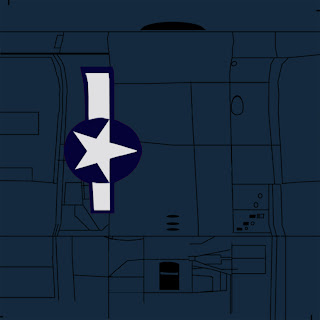
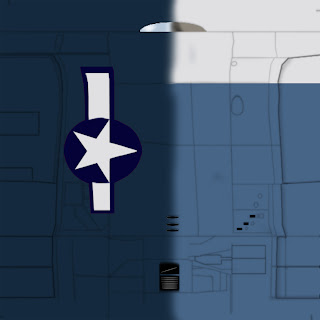
Below the wing layer we add a layer of color that is representative of the majority of the aircraft (or Object) color.
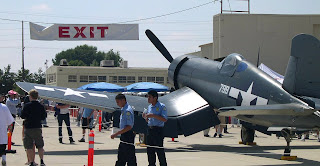
Now we go and observe the RL reference. If you are doing a fantasy subject, you may still use reference to give it that verisimilitude that makes a piece rise above bad fan art. Here we have a few photos that I took of a Real F4U Corsair at the Last Ever Van Nuys Airport Air show, where they celebrated the U.S. Naval Aviation Heritage. Here we put out observation to use.
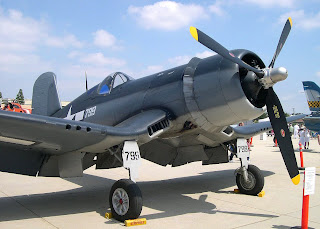
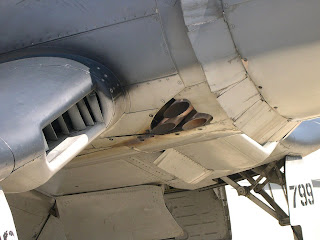
There are panel lines, but they are not very evident even in some of the closer shots, The lines are thin, and somewhat hard to distinguish at any distance. However you can see evidence of fingerprints, smudges, oil drips, and Exhaust stains on the underside of the plane. You will need to suggest these same sorts of things on your maps. Now back to the Wing map…
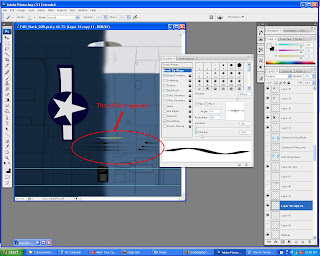
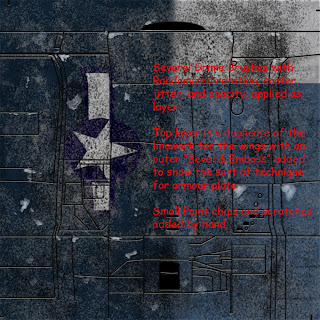
Duplicate the B/W line layer. Next blur that duplicate layer as a “Gaussian Blur” of about X in number. Name that Layer “Grime Mask”
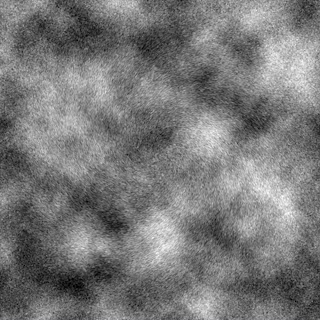
Above the previous layer, fill it with any color and changes the Palette to Black and White with White being the foreground color. Then go to the Menu bar and select FILTER > RENDER> CLOUDS. Within that layer add FILTER>NOISE. Of a level around 4 or 5, not too much but just enough that it’s perceptible. Next, go to: FILTER > PIXELATE >CRYSTALLIZE . and select a crystal size of 4 pixels, the add a faint Gaussian blur. Name this “Grime Layer” and should look something similar to this:
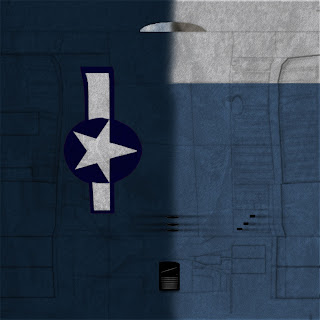
Duplicate the “Grime Layer” and Hide the original layer until later. You will make supplicates of this layer for each exterior map. Hold down Control and click the “Grime Mask” layer. Then make sure the “Grime Layer Copy” is active. Go to “SELECT > INVERSE”. And then hit the back space. Now hide your “Grime Mask” layer and check your work. With the B/W Lines layer takes to about 25% opacity , you should have a result that looks a bit like this:
That’s about it. You can duplicate your “grime Layer Copy” and make one a “multiply layer so only the black shows, or a “Screen” to make only the white areas showing if the surface is dark, or you could put in both, to simulate not only fingerprints but wear as well.
Now move these new layers above the color and insignia layer. You can also add things like Exhaust stains, rust, chipped paint and the like, by adding each effect on a new layer, and then adjusting opacity or layer type until you get a look you like. Remember to check your reference so as not to over do it.

Some other tricks you can do is to adjust your brush shape in Photoshop to create streaks for weathering, as well as use of the various Effects in the layers to create more realism.
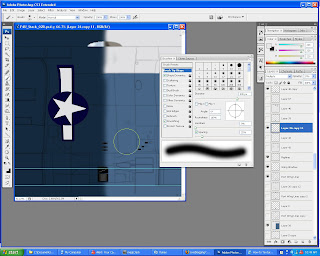
TO change you brush shape, depending on the version of Photoshop you have, Select a round soft brush, then select the brush menu and reduce the “roundness” to 3% , and the direction to the one needed to give you the effect. Then, rather than a tablet, use a mouse and tap the mouse button when you have the brush over the desired area. Use the lasso tool to mask areas.
Let say you want to create the effect of formers and stringers within the fuselage (the ribs of an airplane). On one layer, create the inside of the skin by picking a color and applying it. On a layer above create the stringers (Fore and Aft Ribs) using the same colors as the inside skin, and on a layer above that create the Formers (Vertical Ribs). On the stringers, apply Bevel and Emboss, filter to give then a 3D form, then add a Drop Shadow to place it against the inside of the skin layer. Next use the same Bevel and Emboss to the former layer, but since the formers are larger, you will give them a bit more of a drop shadow, as well as add an outer glow of a dark color, as a multiply layer to simulate ambient occlusion. Tricks like this can speed up the process greatly.

A variation of this technique might be wanting to make a smooth embossed shape.
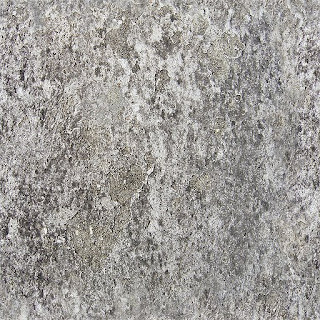
Additional weathering can be done with Custom Brushes or using degraded images with low opacities as grime layers. Pick photos or images with a number or small high contrast elements usually black and white. A photo of gravel, dirt, or old Concrete is usually best for this, but other4 forms such as splattered paint can also be good for that. Desaturate the photos and apply them as multiply layers, and reduce the opacities to low single digits.
The following two images were used to generate the weathering.
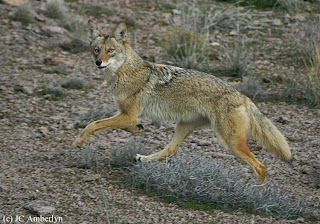 Photo by J.C. Amberlyn
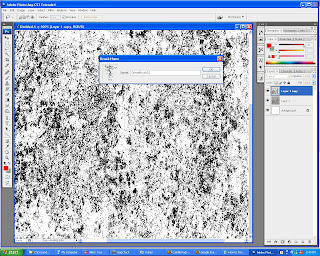
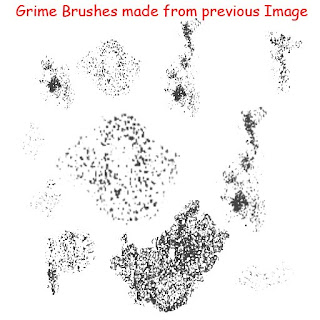
You can also turn portions of the photos into “ Grime Brushes” but turning the images to grayscale, and upping the contrast to you get a sea of white with black dots and smudges on it Select a nice area of dots and marks, withthe lasso and put them in a new document for conveineince sake, and then use "CTRL A" to select them all and go to the EDIT menu and pull down to "Define Brush" or "Define Brush Preset depending on your version of Photoshop. Now you have a grimebrush to create effects such as these.
Ground vehicles suffer more abuse and weathering and deferred maintenance than Planes do. So moderate your weathering and your effcts according to the "history" of the item you are making. Is it brand new, and polished to a high degree, or is it worn but well kept, or is it neglected except it's most basic needs, to remain functional, or is it a barely finctional wreck one can only guess is still running? Layering the damage with different grime brushes in dark colors, light colors and the browns of rust can give your creation a lot more solidity and plausibility rhan the typical featureless swatch of color typical of most SL builds.
But through careful observation of real life textures color changes and weathering,couplesd with these new skills, you can indeed soon texture likea pro inside SL. If you have any comments, questions or needed clarifications, please post a comment and I'll try to anser them there, or in subsequent articles.
Good Luck
--Karl

Labels: Paint textures, photoshop tricks, planes.


